Finance
How businesses can register for VAT in the UAE
If you plan to launch a business in the UAE, you may need to register for VAT (Value Added Tax) first. Companies that meet the set criteria for VAT must register with the Federal Tax Authority (FTA) and submit VAT returns at the end of every tax period. So, how does VAT registration in the UAE work for businesses? Read on as we review the required documents and the online process to apply for VAT registration in the UAE.

DOES VAT APPLY TO MY BUSINESS?
Before a business can apply for UAE VAT registration, it must meet these requirements:
- VAT is obligatory in the UAE on businesses whose taxable supplies and imports over the past year exceed the mandatory threshold of AED 375k.
- It also applies to businesses that foresee the total value of its taxable supplies and imports exceeding AED 375k in the next 30 days. This threshold does not apply to foreign companies.
- Businesses with taxable supplies and imports or taxable expenses of AED 187.5k (or above) in the next 30 days may apply for voluntary VAT. This also holds true for a company expected to make a turnover of the threshold amount in the same time frame.
WHAT IS INCLUDED IN TURNOVER FOR VAT TAX IN THE UAE?
- Turnover for VAT in the UAE includes taxable supplies (all goods and services supplies made in the UAE).
- The value of taxable goods and services imported and a whole or part of the other business.
- It also includes the value of taxable supplies made by the acquired whole or part of the business.
- On the other hand, taxable supplies include all goods and services made in the UAE. Only a limited number of supplies are exempt from the taxable supply for VAT.
You can read our blog on the UAE tax system for further guidance.
HOW CAN BUSINESSES REGISTER FOR UAE VAT TAX?
Unregistered businesses in the United Arab Emirates may register for Value Added Tax via the Federal Tax Authority online portal.
The VAT registration process in the UAE is a simple two-step process. First, set up an e-service account and second, access the new account and complete the VAT registration.

CREATE AN E-SERVICES ACCOUNT
An FTA-approved e-Services account is mandatory for businesses to register for VAT in the UAE successfully. To start the process, visit the Federal Tax Authority website and follow these steps to open an e-Service account:
- Select the Sign-up button on the home page and fill in details like a password, email ID and security code.
- After filling and submitting the form, an automatic email will be generated and sent to your registered email ID for verification.
- Log into your new e-Services account with your username and password.
REGISTER FOR VAT
Your e-Services account will be created after you verify your email address. After logging in successfully, you will be asked to ‘Register for VAT’ and taken to the “Get Started Guide.”
The guide details specific requirements related to VAT registration in the UAE. Divided into short sections, it discusses the process and the data required to complete it.
It is strongly recommended that you read the guide carefully to avoid errors. After you have read it, click “Proceed” and a VAT registration form will appear.
The form includes eight sections, with each requiring specific details.
- About the Applicant
- Details of the Applicant
- Banking Details
- Contact Details
- About VAT Registration
- Business Relationships
- Declaration
- Review and Submit
Applicants must complete all mandatory fields of a current section before moving on to the next. Remember:
- You should also save your progress as you fill out the form.
- After completing the sections with the necessary details, click Save and Review. At this point, you can check your answers before submitting them.
- Click on Submit for Approval after you have reviewed the details. The application’s status on the Dashboard will change to Pending.
- You will also receive an email confirming that your application has been received.

WHAT ARE THE DOCUMENTS NEEDED FOR UAE VAT TAX REGISTRATION?
Documents to be submitted while registering your business on the FTA e-services portal include:
- A copy of the business trade license.
- Passport copies of the partners or company owners as declared on the license.
- Copy of the company’s Memorandum of Association (MOA).
- Bank account details.
- Contact details of the company.
- Emirates ID copy held by the business partners or owners.
- Nature of performed businesses and activities.
- An income statement from the last 12 months.
- Anticipated income & expenditure for the upcoming 30-days after receiving the Tax Registration Number
HOW TO CHECK VAT REGISTRATION?
You can always review the progress of your application after completing the requirements on the UAE VAT registration portal. Being aware of the following terms can help you keep track of the application.
- Drafted: The registration form hasn’t been completed or submitted.
- Pending: The form has been received by the FTA and is either under review or withheld until additional information is received from the applicant.
- Suspended: Your registration form has been suspended, a Tax Registration Number (TRN) has been received, and your tax group registration has been approved.
- Rejected: The FTA has rejected the registration form.
- Approved: Registration has been approved, and your business is registered for VAT.
LATE REGISTRATION
Those who fail to register for VAT under the deadline set by the Federal Tax Authority are liable to pay a fine of AED 10k. Registered users can access the “late registration penalty” option to pay the late fee on their dashboards.
Once the FTA reviews your application and finds it satisfactory, it will issue a Tax Registration Number (TRN). The official confirmation will be in the form of a VAT Certificate.
FREQUENTLY ASKED QUESTIONS
WHAT IS THE STANDARD VAT RATE FOR COMPANIES IN THE UAE?
The standard rate of VAT in the UAE is 5%.
DO I NEED TO REGISTER FOR VAT IN THE UAE?
Yes, if you have a business in the UAE with imports and supplies that exceed AED 375k annually, you are required to register for VAT.
HOW TO REGISTER TO VAT ONLINE IN THE UAE?
To register for VAT online in the UAE, you’ll need to visit the official Federal Tax Authority website to create a new e-services account. Use the sign-up button on the homepage and provide the required details. After completing the form, click the submit button to receive an automated email on your verified email ID. You can now start your registration for VAT in the UAE.
WHAT SECTORS ARE EXEMPT FROM VAT IN THE UAE?
Rents in Dubai for residential units are real estate transactions exempt from VAT. Other sectors in the UAE that are VAT exempted include:
- Financial services
- Bare land
- Local passenger transport
WHAT IF I NEED TO AMEND MY VAT REGISTRATION IN THE UAE?
All amendments you make after registering must be updated on your records within 20 business days. Some VAT registration updates and modifications, like those under the category of ”Business Relationships,” require approval from the Federal Tax Authority. For a complete list of amendments that require approval from the Federal Tax Authority, visit their official website.
That’s a wrap on our guide to VAT registration in the UAE for businesses. Apart from the eligible companies, businesses from some sectors do not need to register for VAT. Check out this VAT exemption in the UAE guide to learn more.
If you need help navigating the complicated processes of Value Added Tax, some excellent tax and VAT consultants in the UAE can help you.
Finance
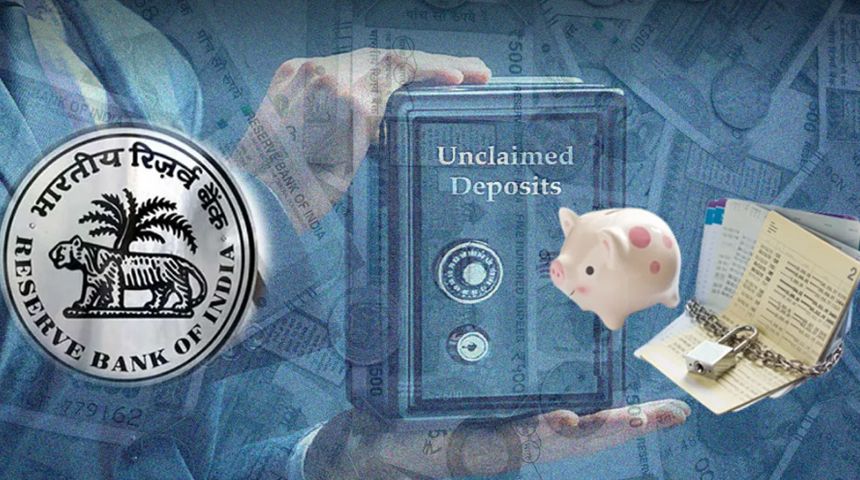
RBI Launches UDGAM – Centralised Web Portal for Searching Unclaimed Deposits Across Banks
RBI Launches UDGAM – Centralised Web Portal for Searching Unclaimed Deposits Across Banks
Reserve Bank of India (RBI) governor Shaktikanta Das on Thursday launched UDGAM, an unclaimed deposits – gateway to access information, a centralised web portal, which would make it easier for people to search for their unclaimed deposits across multiple banks in one place. A public interest litigation (PIL) pending before the Supreme Court filed by Sucheta Dalal, managing editor of Moneylife and founder-trustee of Moneylife Foundation, also seeks to make public on a centralised platform details of unclaimed money of investors and depositors taken by various regulators and which remains inaccessible to rightful legal heirs.
The launch of the web portal will aid users in identifying their unclaimed deposits and accounts and enable them to either claim the deposit amount or make their deposit accounts operative at their respective banks, RBI says.
To begin with, bank customers could access the details of their unclaimed deposits regarding seven banks presently available on the portal.
The search facility for remaining banks on the portal will be made available in a phased manner by 15 October 2023.
Reserve Bank Information Technology Pvt Ltd (ReBIT), Indian Financial Technology & Allied Services (IFTAS), and participating banks have collaborated on developing the portal.
In April, RBI governor Das announced the development of a common web portal to search for unclaimed deposits. At present, the depositors or beneficiaries of unclaimed bank deposits of 10 years or more have to go through the websites of multiple banks to locate such deposits.
According to the Union government, the total unclaimed deposits transferred to RBI by the public sector banks (PSBs) as of February 2023 was Rs35,012 crore.
RBI says UDGAM has been launched amid a rising amount of unclaimed deposits in banks, and it has been undertaking public awareness campaigns from time to time to sensitise the public on this matter.
Further, through these initiatives, the RBI has been encouraging people to identify and approach their respective banks for claiming unclaimed deposits.
The deposits remaining unclaimed for 10 years in a bank are transferred to the depositor education and awareness (DEA) fund maintained by RBI. Depositors’ protection being an overarching objective, RBI says it has been taking various measures to ensure that newer deposits do not turn unclaimed and existing unclaimed deposits are returned to the rightful owners or beneficiaries after following due procedure.
On the second aspect, RBI says banks display the list of unclaimed deposits on their website. “To improve and widen the access of depositors or beneficiaries to such data, RBI has decided to develop a web portal to enable search across multiple banks for possible unclaimed deposits based on user inputs. The search results will be enhanced by the use of certain artificial intelligence (AI) tools.”
Sucheta Dalal, managing editor of Moneylife and founder-trustee of Moneylife Foundation, had filed a public interest litigation (PIL) in the Supreme Court on making public on a centralised platform details of unclaimed money of investors and depositors taken by various regulators and which remains inaccessible to rightful legal heirs.
In response to the petition, the RBI submitted that, during FY21-22, the depositors’ DEAF refunded Rs505.51 crore of 187,975 claimants. According to RBI, settling disputed claims by banks may involve adjudication of facts and appreciation of evidence which are normally subject matters of the court and could lead to avoidable litigation involving the banks, which is not in the interest of the banks and their depositors.
The plea, taken up by senior counsel Prashant Bhushan, is about making public on centralised platform details of unclaimed money of investors and depositors taken by various regulators and remains inaccessible to rightful legal heirs.
In her plea, Ms Dalal contended that unclaimed funds of the public get transferred to government-owned funds like the Depositor’s Education and Awareness Fund (DEAF), Investor’s Education and Protection Fund (IEPF) and Senior Citizen’s Welfare Fund (SCWF) on the ground that the legal heirs or nominees did not claim them, should be made available to the legal heirs or nominees by providing information of holders of inoperative or dormant accounts on a centralised online database.
The petition urges developing a centralised online database under the control of RBI that will provide information about the deceased account holder, including such details as the name, address and last date of transaction by the deceased account holder. Further, it should be mandatory for banks to inform RBI about the inoperative or dormant bank accounts, and this exercise should be repeated after an interval of nine to 12 months.
In response to the petition, RBI submitted that, during FY21-22, the depositors’ education and awareness fund (DEAF) refunded Rs505.51 crore of 187,975 claimants. According to RBI, settling disputed claims by banks may involve adjudication of facts and appreciation of evidence which are normally subject matters of the court and could lead to avoidable litigation involving the banks, which is not in the interest of the banks and their depositors.
Keeping in view the imperative need to avoid inconvenience and undue hardship to the common person, RBI says it had advised banks to decide the threshold, based on their respective risk management systems, up to which they may settle claims in respect of the deceased depositors (in case of accounts without the survivor or nominee clause) based on a letter of indemnity.
IEPF, which holds monies from the unclaimed dividend account that remains unpaid or unclaimed for seven years, offers a search facility on its website, operated under MCA-21. Further, IEPF has relaxed certain requirements, including advanced receipt, succession certificate or probate of a will (relaxed for a claim of Rs5 lakh for physical and demat shares). It also allowed self-attestation by the claimant instead of notarised documents while relaxing the requirement of affidavits and surety.
As of 31 January 2023, IEPF processed 74,396 claims and transferred dividends worth Rs35.18 crore to claimants. It also transferred 2.29mn (million) shares to the claimants.
Banking
How to Set Up a UPI Account with HDFC Bank: A Step-by-Step Guide
How to Set Up a UPI Account with HDFC Bank: A Step-by-Step Guide

The Unified Payments Interface (UPI) has revolutionized the way we make financial transactions in India. It allows us to send and receive money instantly, anytime, anywhere, through our smartphones. One of the prominent banks that facilitate UPI transactions is HDFC Bank. If you are an account holder at HDFC Bank and want to leverage the power of UPI, this step-by-step guide is tailor-made for you. Here, we will walk you through how to set up a UPI account with HDFC Bank.
Step 1: Install HDFC Mobile Banking App
First, you need to install the HDFC Bank MobileBanking app on your smartphone. You can download it from the Google Play Store or the Apple App Store, depending on your device.
Step 2: Log in to Your Account
Once you have installed the app, open it and log in to your HDFC Bank account using your Customer ID and Password or Quick Access PIN.
Step 3: Navigate to UPI Section
After logging in, navigate to the ‘Funds Transfer’ section. Here, you will find the ‘UPI’ option. Click on it.
Step 4: Create a New UPI ID
After navigating to the UPI section, you will see an option to ‘Create UPI ID.’ Click on it.
Step 5: Provide Required Details
You will now be prompted to enter your account details and choose a UPI ID. The UPI ID is like your unique digital address for UPI transactions. It typically ends with “@hdfcbank.” Make sure to remember this ID as it will be needed for all future UPI transactions.
Step 6: Set Your UPI PIN
Next, you will be asked to set a UPI PIN. This PIN will be required each time you make a transaction. Make sure to choose a unique and hard-to-guess PIN.
Step 7: Confirm Your Details
After setting the UPI PIN, you will be shown a summary of your details. Confirm them, and you’re done. Congratulations! You have successfully set up your HDFC Bank UPI account.
The Bottom Line
UPI has made our lives easier by simplifying the process of making payments. And setting up a UPI account with HDFC Bank is a breeze, thanks to their user-friendly mobile app. So if you’re an HDFC Bank customer and haven’t yet set up your UPI account, follow this guide and join the digital payments revolution.
We hope this step-by-step guide on setting up a UPI account with HDFC Bank was helpful. If you have any questions or encounter any problems while following these steps, feel free to reach out to HDFC Bank’s customer service.
We’re excited for you to take the next step in your digital banking journey with HDFC Bank and UPI. So, go ahead and set up your UPI account today.
Happy banking!
(Please note that this guide is accurate as of the time of writing. The process for setting up a UPI account with HDFC Bank might change in the future. Always check with the official HDFC Bank resources for the most up-to-date information.)
Banking
How to Setup a UPI Account with Axis Bank: A Step-by-Step Guide
How to Setup a UPI Account with Axis Bank: A Step-by-Step Guide

If you’re seeking an efficient and convenient way to handle your monetary transactions, Unified Payments Interface (UPI) is the perfect solution for you. Designed by the National Payments Corporation of India, UPI simplifies your bank-related operations significantly. In this article, we will walk you through how to set up a UPI account with Axis Bank in a comprehensive, step-by-step fashion.
Understanding UPI
But first, let’s delve into the concept of UPI. Unified Payments Interface (UPI) is a payment system that allows instant money transfer between any two bank accounts using a mobile platform. It’s interoperable across various banking platforms, which means you can operate different bank accounts through a single mobile application.
The Benefits of UPI with Axis Bank
Creating a UPI account with Axis Bank brings along numerous advantages:
- It’s available 24/7, making it an extremely convenient way to transact.
- Offers real-time transaction processing.
- Has a simple, mobile number-based identification process.
- Enables ‘Peer to Peer’ collection requests and instant payment approvals.
By setting up a UPI account with Axis Bank, you can enjoy these benefits and many more!
Step-by-Step Guide to Setting up UPI with Axis Bank
Before proceeding, ensure that you have the following:
- An Axis Bank account
- A smartphone with internet connectivity
- Your registered mobile number linked to your Axis Bank account
Step 1: Download the Axis Bank Mobile App
The first step is to download the Axis Bank Mobile App from the Google Play Store or the Apple App Store, depending on the smartphone you use.
Step 2: Open the App and Navigate to UPI
Once the app is installed, open it and locate the ‘UPI’ option in the menu.
Step 3: Select ‘Send Money using UPI’
Next, tap on the ‘Send Money using UPI’ button, and then choose ‘Create New UPI ID.’
Step 4: Link your Axis Bank Account
Here, you’ll have to link your Axis Bank account. To do so, select ‘Add Bank Account’ and pick ‘Axis Bank’ from the list of banks. Make sure your phone’s SIM card matches the mobile number linked with your bank account.
Step 5: Create your UPI ID
Your UPI ID, also known as a Virtual Payment Address (VPA), will be auto-generated. It usually follows the format: ‘yourname@axisbank’. You have the option to change this if you want to.
Step 6: Set your UPI PIN
You’ll need to set a UPI PIN for your transactions. You’ll be asked for your debit card details to set the UPI PIN.
That’s it! You’ve now successfully set up your UPI account with Axis Bank.
Conclusion
This simple step-by-step guide is all you need to effortlessly set up your UPI account with Axis Bank. Enjoy the convenience and efficiency of online banking, and make your financial transactions a breeze. Be sure to safeguard your UPI ID and PIN to ensure the security of your transactions.
Embrace the digital era with UPI, and make your banking experience seamless and enjoyable!

Adobe Photoshop 2024 Free Download (Latest version)

Railways to directly operate auto-rickshaw service in Kannur railway station


